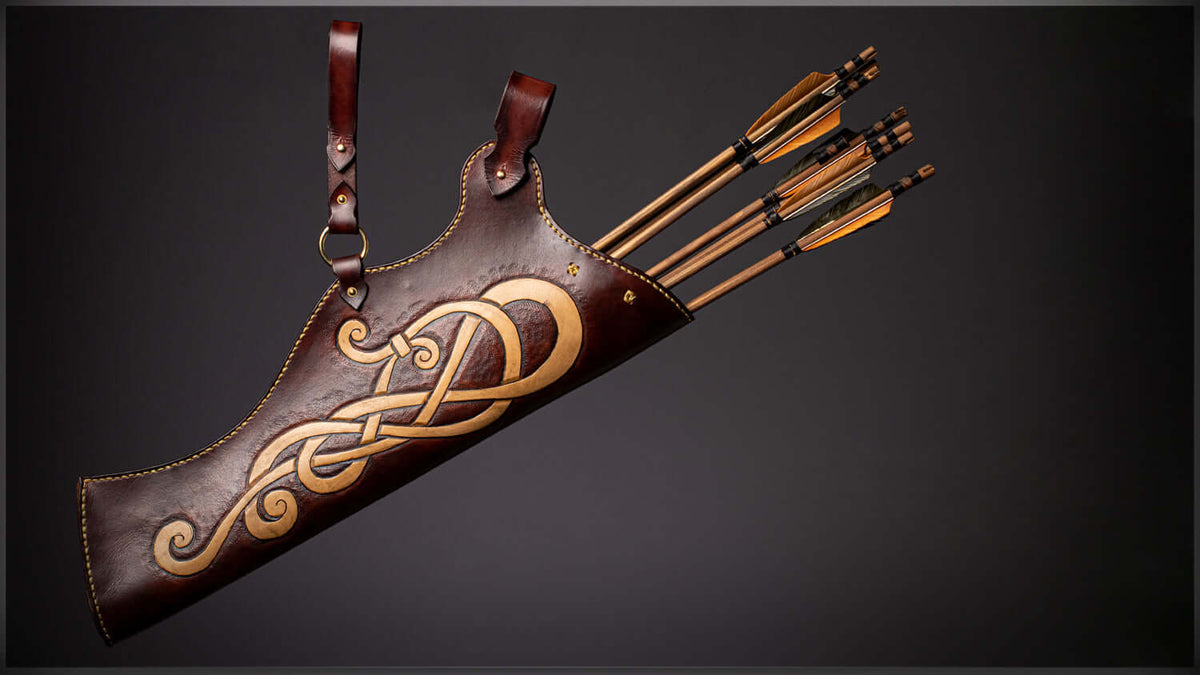
Making a Leather Quiver - PDF Pattern
|
|
5 min
|
|
5 min
Table of content
Welcome back, everyone! Magnus here from Dark Horse Workshop with a new project tutorial. Today, we're diving into the creation of a belt quiver , featuring some beautiful knotwork. Whether you're a leatherworking enthusiast or looking to add a functional, stylish piece to your archery gear, this project will spark your creativity.
As always, the patterns and artwork for this project are available on my website, and occassionally on my Patreon.
https://patreon.com/darkhorseworkshop
Also I have a tutorial video on YouTube. Feel free to watch that if you need some extra insight.
Let’s jump into the process!
I’ve put together a list of the tools and supplies you’ll need to complete this project, conveniently linked to my Amazon Associates account. By using these links, you help support me with a small commission at no extra cost to you. For items like leather, however, I don’t recommend buying through Amazon.
To purchase leather and give you another option for your Tools, I’ve partnered with Lonsdale Leather. Use the link provided along with my exclusive 10% off coupon code to grab your tools from them instead, with free shipping on orders over $150 to Canada and the USA. Happy crafting!
LONSDALE LEATHER
https://lonsdaleleather.com/darkhorseworkshop
CODE- DARKHORSE10
This quiver pattern includes multiple pages, so the first step is to cut them out and tape them together. Instead of tracing onto the leather, I taped the pattern directly onto it—a trick that ensures precision in hole placement for stitching. I've seen this method done a lot now and it really helps get everything perfect.
Here’s how:
This method isn’t for everyone, but it’s excellent for detailed projects like this and one-offs.
Beveling the edges of your project help prepare it for burnishing and gives the piece a clean, polished look. For this project:
This approach creates a smooth, single-edge effect that looks professional while maintaining functionality. If you were to just bevel around both the front and back of the whole main body of the Quiver, you'd have a little indent when it's time to burnish the pieces instead of a nice smooth edge.
The knotwork carving is a standout feature of this quiver pattern, but I have a ton of other Artwork that could be used instead of it in my Art Packs on my website. Or you can put your own Art on it which if I'm being honest is even better. Personalizing Your project and giving it that touch of you is always a fantastic idea.
To elevate the look further, I added texture around the knotwork using stamps.
For a clean, vibrant finish, I used Lonsdale Leather Roma Dye or Fiebings Pro Dye followed by an acrylic resist to prevent streaking and protect the carved details. After the resist dried, I applied an antique stain, then a light finish afterwards.
I opted for button studs on this quiver in order to attach it to the belt. The straps and hole placements were customized to my preferences, so you may need to adjust these to suit your own needs. You could also use buckles, rivets, or even snaps as an alternative.
When adding anything that is threaded to a leather project like button studs or Chicago Screws I almost always use some Loctite. It doesn't need to be super strong, just enough to stop them from undoing. ESPECIALLY Chicago Screws.
For added functionality, I included dividers inside the quiver to keep arrows neatly separated.
After stitching our Leather Quiver Pattern together, I burnished all the edges with wax for a smooth finish. I also added solid brass rivets, which I love for their aesthetic and durability. Remember, you can and probably should use simple alternatives if preferred. I also add our final pieces of hardware like the O-ring
Thanks for reading along as I guide you through my quiver pattern. Be sure to check out the full video linked here for more insights on this project.
You can also find me on the Dark Horse Workshop Discord server, which at the time of this Blog Post has over 900 people. You can chat with like-minded creators, discuss projects, or just show your work. See you soon!
- Magnus
DISCORD
https://discord.gg/sSSD674Xy2


